Positions Tab Overview
The Positions tab consists of the following sections:
- Positions
- Reporting Structure
- Compensation
Important! Depending on your role, the Positions tab might look different and offer different features. For instance, employees without administrator access won't see the Reporting Structure and Compensation sections. Want to know more about user roles and permissions? Check out the Roles and Permissions article.
Now that you have a general overview of the Positions tab, let's delve into each section individually to explore their specific functionalities.
Positions
The Positions tab provides an overview of the employee’s career path and current workload within the organization. The tab is divided into blocks: Career History and Accountability.

Career History: Shows the employee’s position history, including the hire date, time period, status, employment type, branch, and assigned body for each role. Users can also add new positions, edit existing position details, and delete the current position when needed.

Accountability: Displays the employee’s active business functions and overall workload percentage to help track responsibilities and workload distribution. You can also manage accountability assignments by clicking the Manage button. In the opened sidebar, they can view and update details such as role (e.g. CEO), workload percentage, temporary assignment settings, start date, and total allocation, as well as distribute workload equally.

To add a new position
- Select the + Add button.
- Fill in all the required fields.
- Click Save to save the entry or Cancel to discard the changes.

Note: Positions should be added in chronological order, from the earliest records to the latest ones.
Reporting Structure
- People Supporting Me: Your managers, mentors, and coaches.
- People I Support: The пеопле you lead or help develop.
Each person in the list is shown with their key professional details to help you identify them quickly:
- Photo and Name: For easy visual recognition.
- Team Member Badge: A green label showing colleagues who are part of the employee’s main team.
- Job Title: Their current position within the organization (Content Writer, Data Analyst).
- Level: Their professional level (e.g., Experienced, Senior).
- Functional Role: The specific relationship they have with the employee, such as Security Auditor, Coach, or Direct Manager.
- If you see a Lock 🔒 instead of a Bin icon, it means this relationship is system-generated (based on the official org chart) and cannot be removed manually from the list.

To update the reporting chain, use the + Add button in either the People Supporting Me or People I Support sections. This opens the Add Relation window:
Add Relation
- Relation Type:
By default, the system automatically selects the correct Relation Type based on the block where you clicked Add.
- Supporting Me: Select this if you are adding someone who will guide this employee (e.g., adding a new manager or coach). The person will appear in the left-hand section.
- I Support: Select this if this employee is responsible for guiding or managing someone else. The person will appear in the right-hand section.
- Employee: Select an employee.
- The system will show their Job Title and Branch/Body to ensure you select the correct person.
- Relation Name: Choose the specific role for this relationship (Direct Manager, Coach, Security Auditor, or Mentor).
- Connection Style: This visual indicator (e.g., a dotted line) shows how the relationship is categorized in the organizational chart - representing either direct or functional reporting.
- Team Member (Toggle): When enabled, the employee is officially considered a team member within this specific relation.

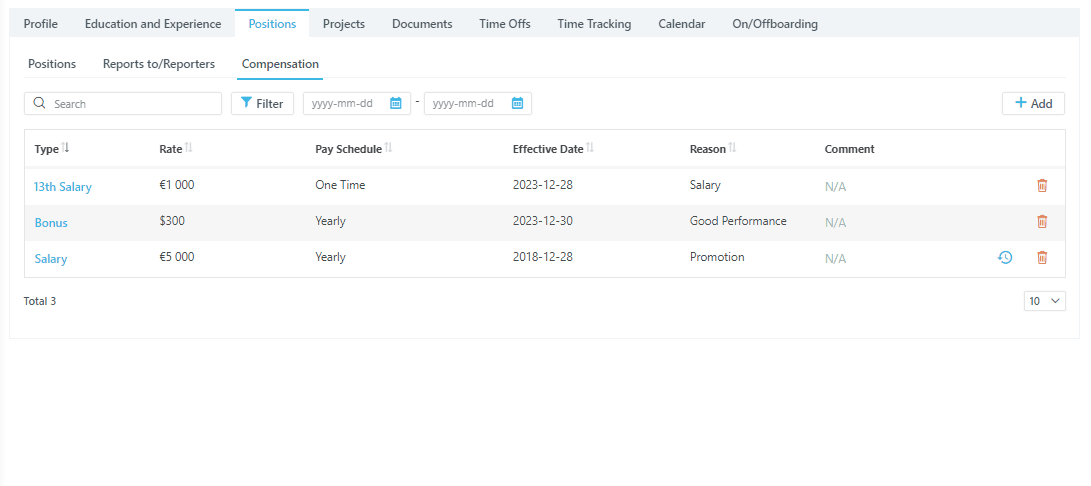
Compensation
The compensation tab allows you to keep records of any kind of compensation given to the employee, review and update compensation details.
The page includes:
- Filters and a search bar: These help you find a specific compensation record or type of compensation quickly and easily;
- A list of all Compensation Records: This provides a complete overview of all compensation awarded to employees;
- Date filters: These allow you to specify the period for which you want to view compensation records;
- And + Add button for adding new compensation record details.
Adding a Compensation Record
To add a Compensation record:
- Select + Add;
- Fill in the form:
- Pay Rate: Type in the amount and select the currency from the drop-down menu;
- The list is generated based on the Currencies added under Settings → Company Structure → Company Profile → System Settings → Default Currency;
- Type: Select a Compensation Type:
- The list is generated based on the Compensation Types added under Settings → Customization → Key Properties.
- Periodicity: One Time or Recurring:
- If it is of a recurring type, you will need to choose the payment periodicity from the Pay Schedule drop-down menu.
- Effective Date: The date from which this compensation starts;
- Reason: Select a Compensation Reason:
- The list is generated based on the Compensation Reasons added under Settings → Customization → Key Properties.
- Comment: Add your notes in the comments section.
3. Click Save to save the record or Cancel to discard the changes.
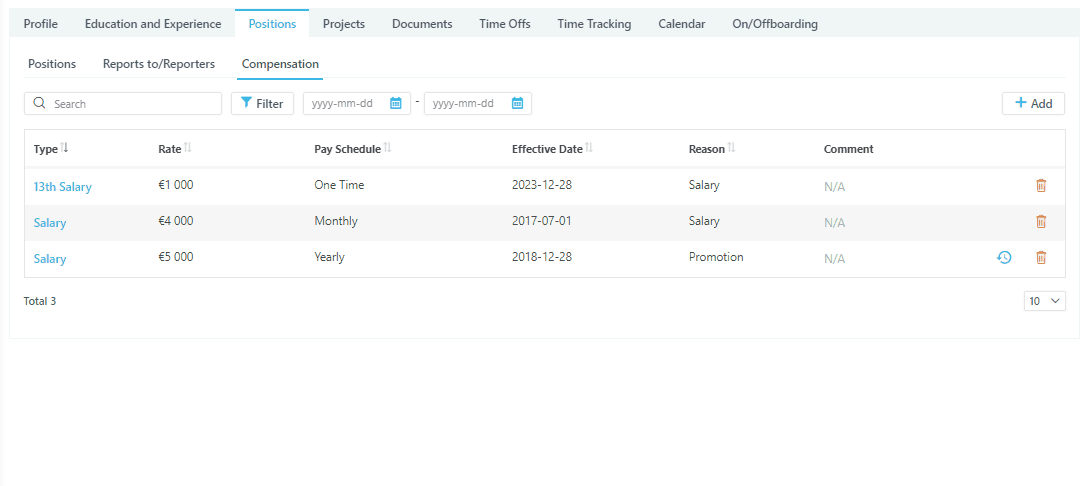
Working the Compensation Records
You can manage the list of compensation records:
- Editing the records: To edit a record, click the name of the compensation and make the changes you need;
- Deleting a record: To delete the Compensation record click on the Bin 🗑 icon;
- Monitoring the changes: Monitor the changes made to a record by clicking the Change History icon.
Note: The Change History icon appears only if the record details were edited.