Working with Applicants
As we already know, applicants appear in the recruitment database in the following ways:
- You manually add them to the system
- You import a list of applicants
- Individuals submit their applications from your organization's public page
In the Applicants sub-section you can view the entire list of individuals who applied or were added to your system, perform bulk actions with them, or make any changes manually per each candidate.
Here on the main Applicant page, you can view the following details: ID; Name; CV; Job Opening s/he is linked to; Applied Date, and finally, the Source.

You can also access an Actions menu by checking the box next to an applicant's name, which allows you to perform various operations on the selected records.
The Actions menu includes the following options:
- Link To Recruitment: Associate the selected applicant(s) with a specific Recruitment.
- Add to Quick Filter: Save your current filtering criteria as a Quick Filter for future use, saving you time when accessing specific groups of applicants.
- Add Tags: Assign tags (keywords or labels) to the selected applicant(s).
- Example: You might add tags like "Best Match," "Experienced," "Internal Referral," or "Rejected" to easily identify and manage applicants with these characteristics.
To act, simply click on the corresponding item in the menu.
Note: You can also add a new tag to the list by entering its name and clicking Save.

Working with Applicant's Profile
To view the applicant's profile:
- Click on the applicant's name
- Scroll down to see all the available fields and filled in details
At the top of the profile, you are able to see the general information about the applicant, such as:
- Full name: Kim Grey
- ID: 2504
- Email address: [email protected]
- Applied for: Job Opening or position s/he applied for (or has been added);
- Applied Date: Date when s/he was added or applied
- Source: Channel or method through which the individual discovered the Job opening/position in question
- Tags: any specific criteria that you can add to the applicant(s) which may later group and identify them
- You may want to use the filters to later find the applicants/candidates with those specific criteria

You can also see the All Applicants button, which has next and previous functionalities allowing you to navigate within applicants' profiles.
Also, a button displays a clear count in the format (Serial Number/Total Number), allowing you to:
• See the exact number of applicants in your current filtered or sorted list.
• Track the current applicant serial number within the filtered or sorted list.

Viewing Application History

While viewing the applicant's profile first of all the recruiter pays attention to the resumes that have been uploaded internally when for example adding the applicant to the system or when the applicant uploaded the resume himself/herself. It is possible to:
- View the application history depending on how many times and for which positions the individual applied or was added for
- Delete any of the application histories
- Edit the specific application history and make changes. For example:
- Change the Job Opening/position
- Source name
- Add a comment
- Update the Applied for date
- And finally, re-upload the CV
Job Opening Field
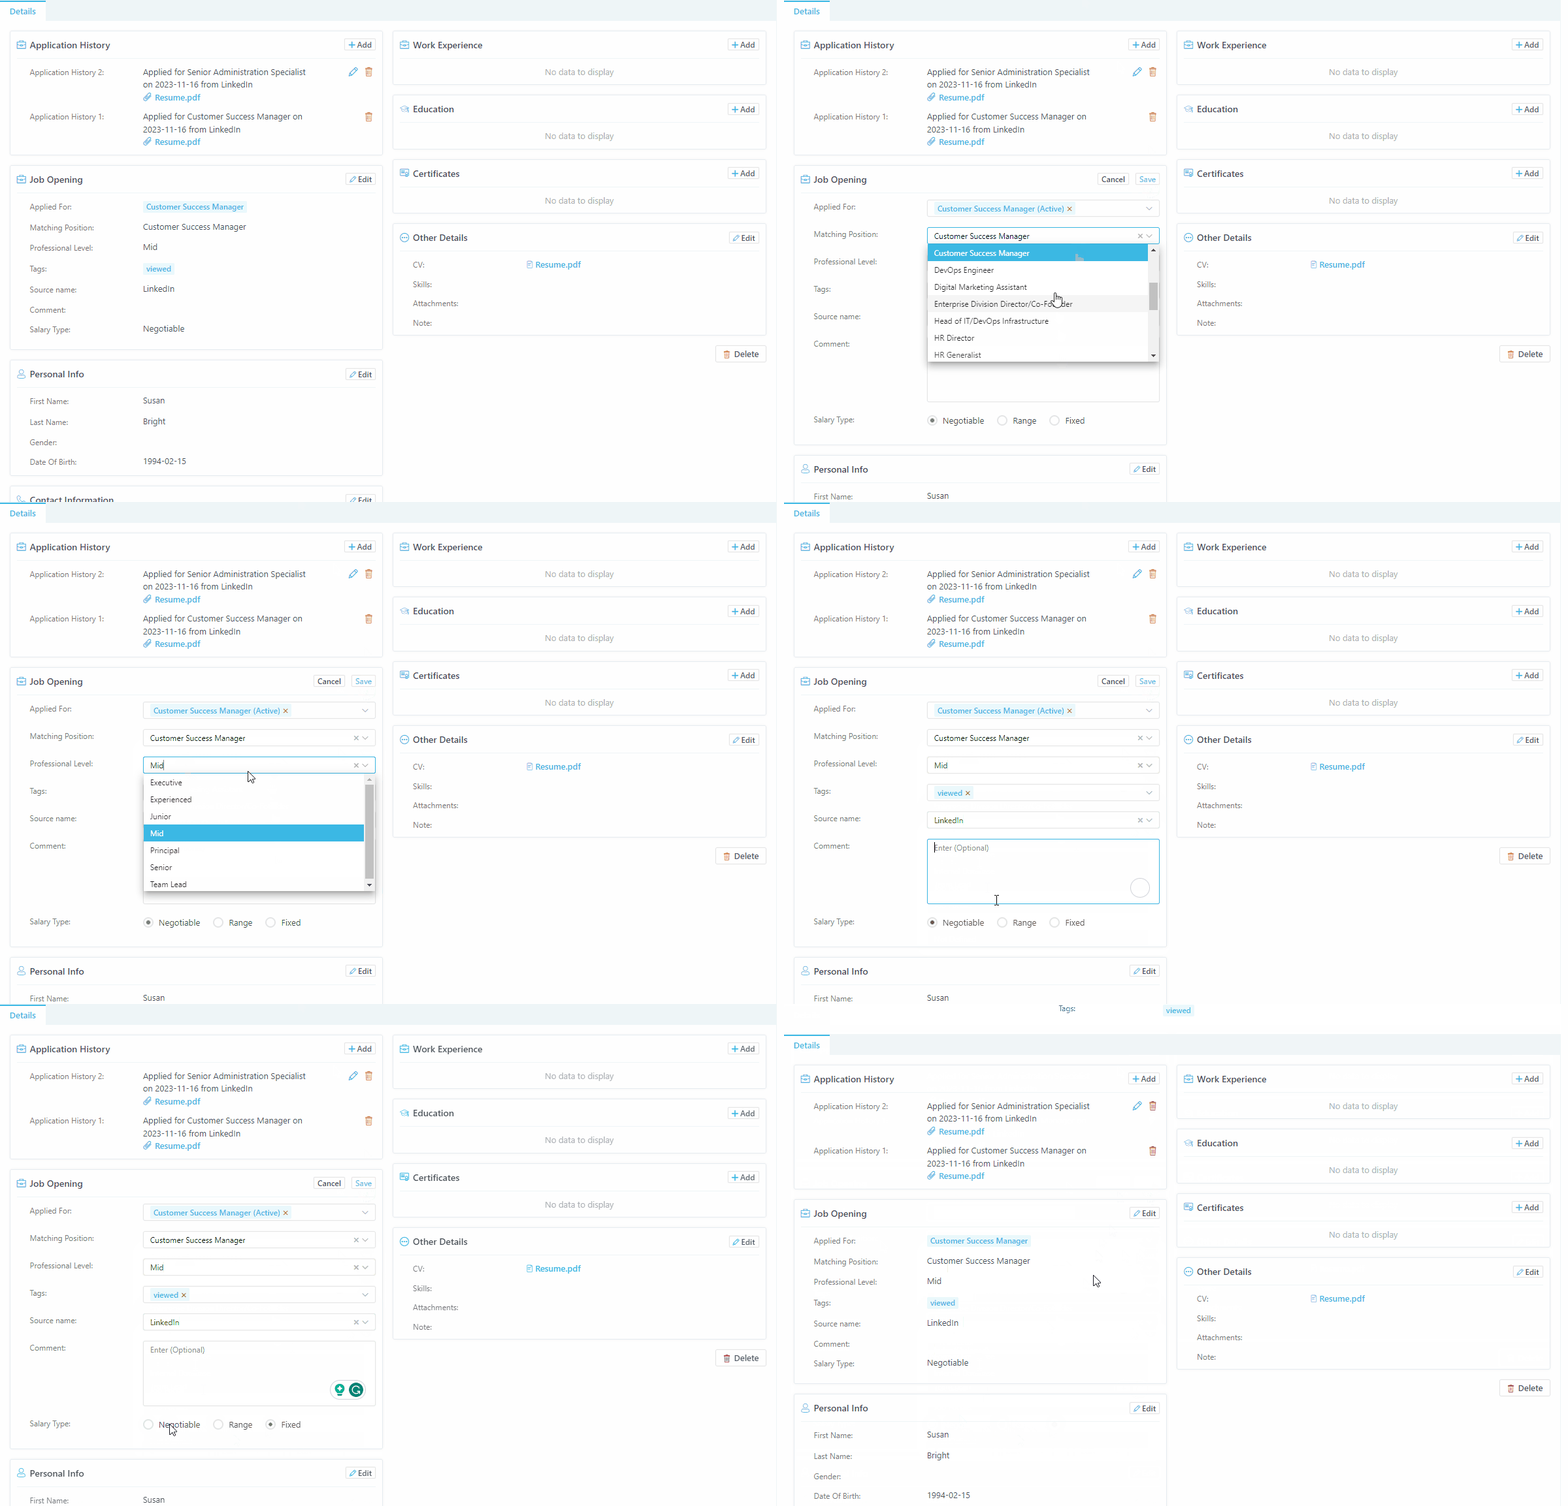
This field will let you view and if needed, update information related to Job Opening. To make any changes:
- Click Edit button
- Go over the fields you would like to modify:
- Applied for: Add or modify the position the individual applied or was added for
- Matching Position: Choose a position which matches to the Job Opening the individual applied for
- Professional Level: in case the information here is missing you can manually choose the candidate's level based on CV and other criteria
- Tags: Choose and add tags you have created in advance to later filter the applicants and candidates easily
- Source name: you can update or choose a new channel where the applicant came from: Linkedin, Job Portals, etc,
- Comment: In this field you can write any additions that will be visible to other recruiters as well
- Salary Type: You can update the salary type if needed and choose one of the following options:
- Negotiable - nothing to add here
- Range - specify the amount range and choose the currency
- Once finished, click Save to keep the changes or Cancel to discard them

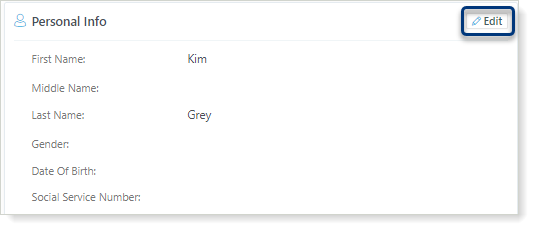
Personal Info

Passport Info

Contact Information

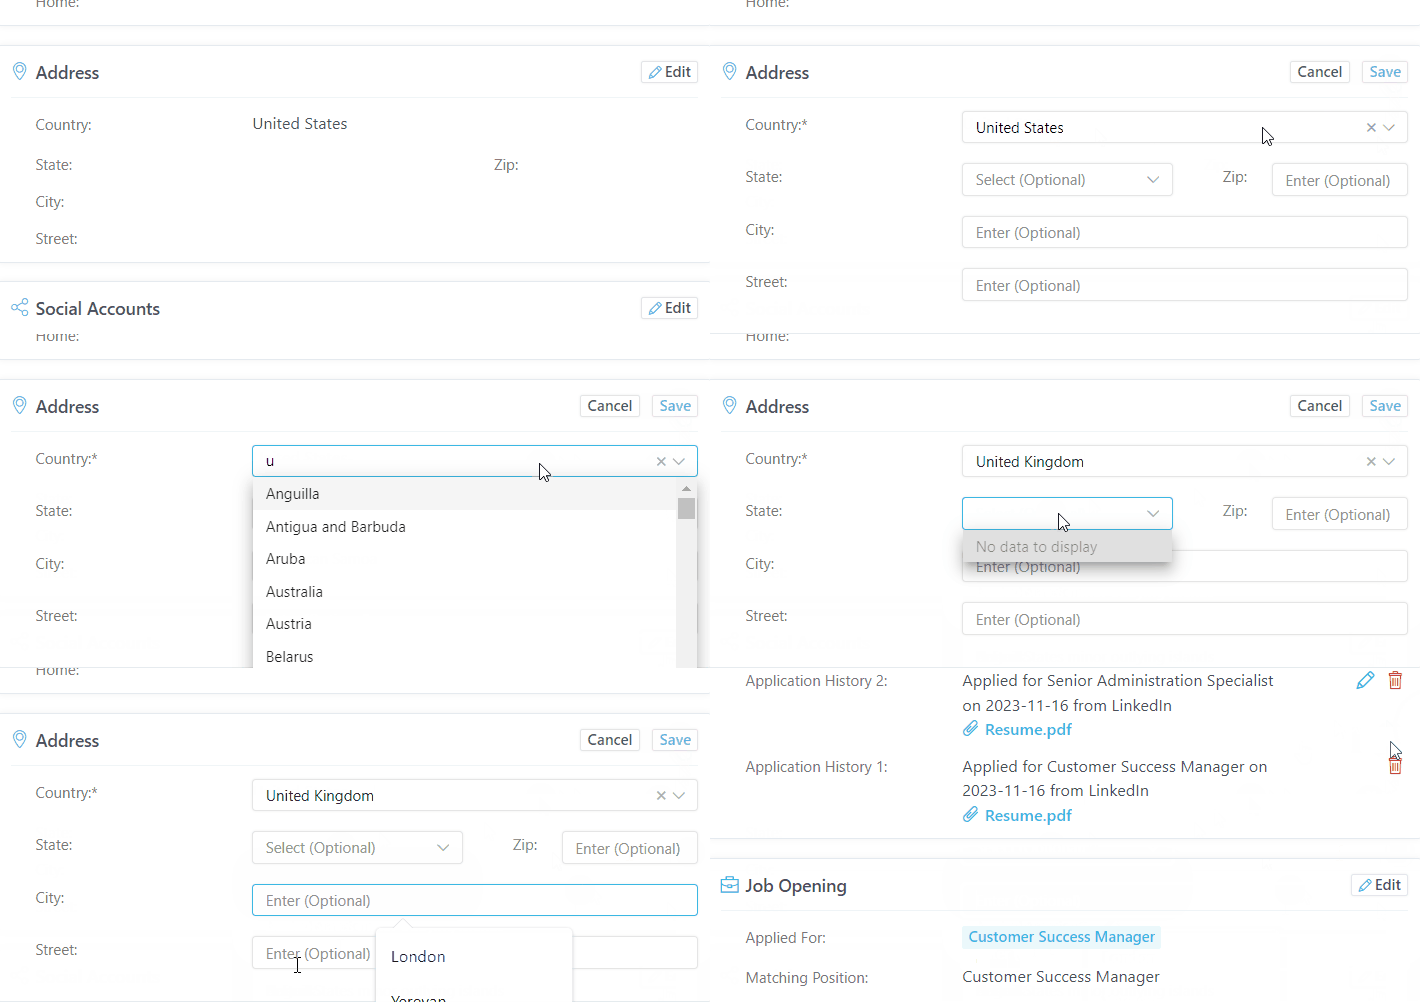
Address

Social Accounts
As with the previous fields we viewed this one is pretty simple as well. You can enter links to the applicant's Facebook, and LinkedIn pages as well as their Instagram, Telegram, and YouTube.

Work Experience
The next field is related to work experience. Here you can either modify or add experience to the applicant's profile. To do that perform these quick steps:
- Click + Add button
- Fill in the following fields:
- Company: specify the company name where the applicant used to work
- Position: specify the applicant's previous position
- Specify the country and city (if needed)
- Finally, specify the Start and End Date of employment (or enable Present if still employed)
The End date selection is disabled when the Present option is active
- Click Save button

Education
To add education to the applicant's profile:
- Click + Add button
- Complete the following mandatory fields: Institution; Degree; Country; Start and End Date
- The Faculty; Specialization and City are considered option fields
- Click Save to keep the updates

Certificates
If your applicant has any certificates you are aware of you may upload them to the system and add additional details. To do that:
- Click + Add button
- Complete the mandatory lines: Title; Certifying Authority; Issuance Date; Expiration Date; upload an attachment
- You can complete the optional lines as well. Those are: Certificate Number; Exam Code
- Once finished, click the Save button
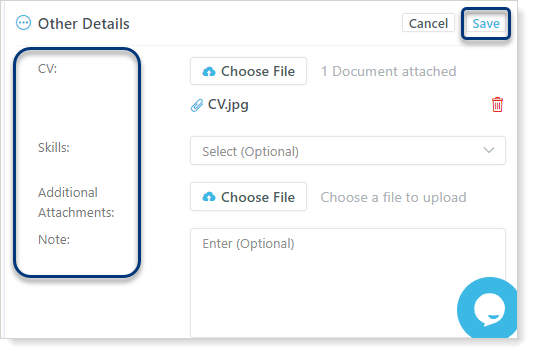
Other Details
Finally, the last field that you can modify in the applicant's profile is Other Details. Here you can Edit the field and attach applicant's CV, add Skills, and other attachments, and even leave a Note.

